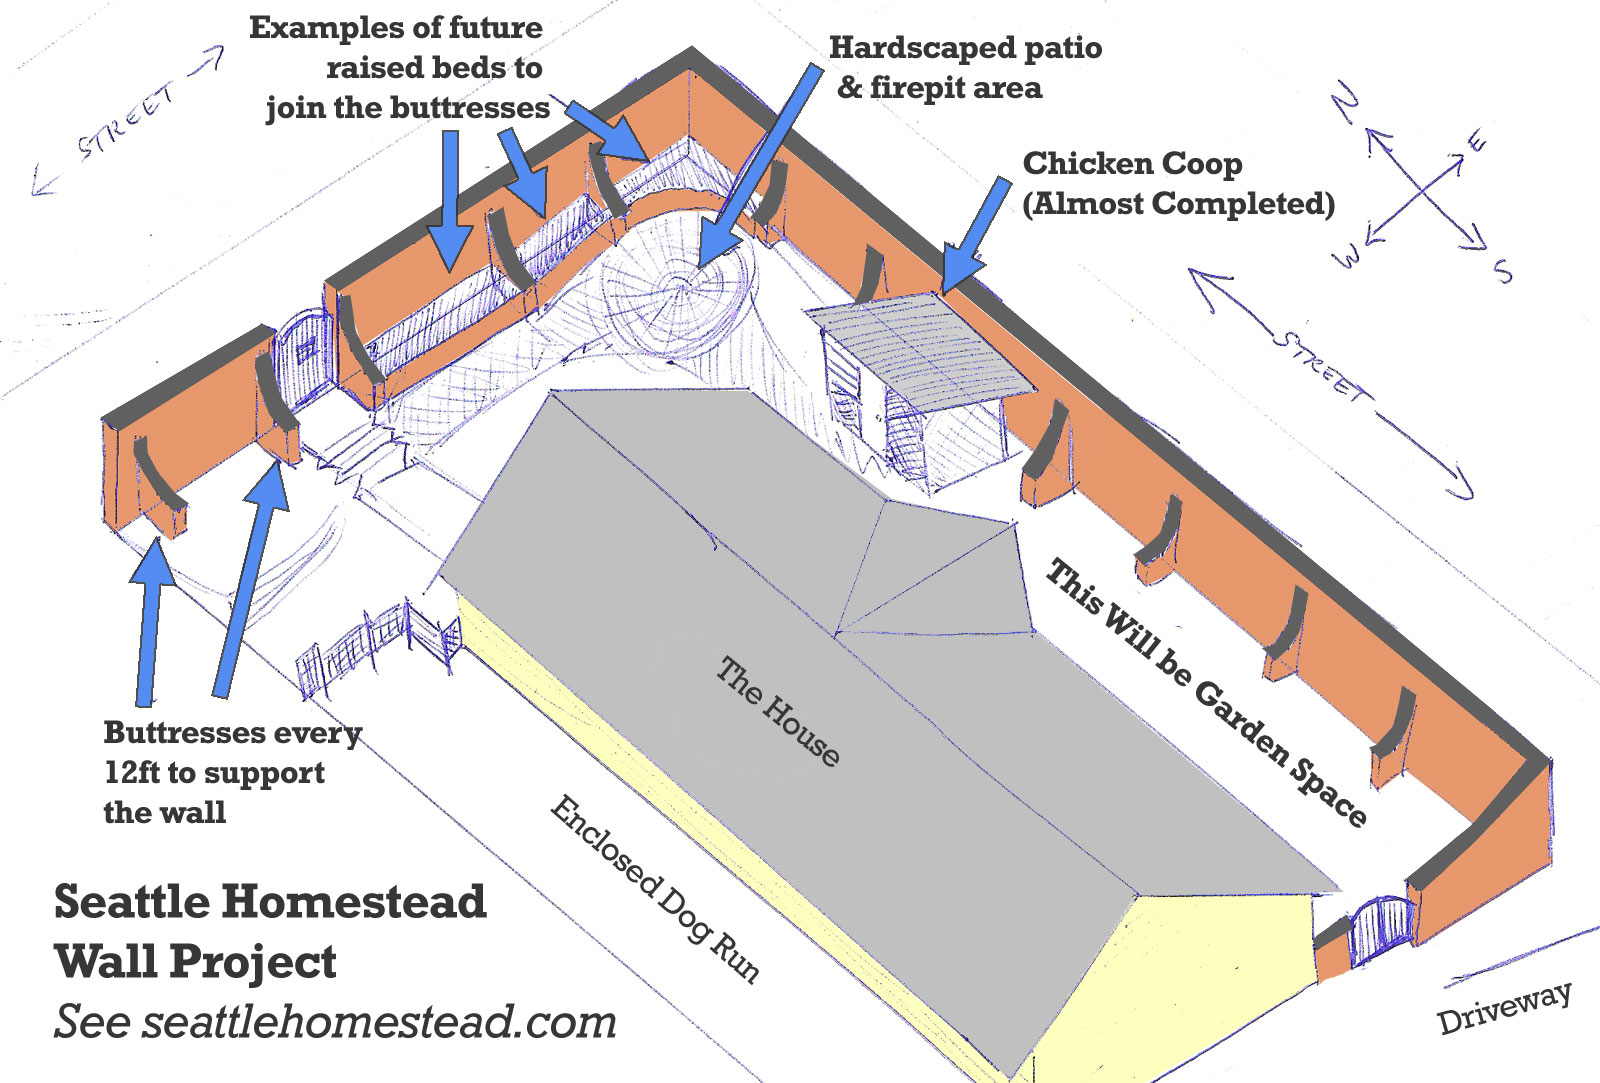
I’ve mentioned our upcoming wall project a few times on this site. Above is the mockup and overhead drawing of what we’re going to be building in 3 weeks. All of the terracotta-colored wall in that diagram is specifically what we’ll be building. You can click here to take a look at the full-size wall diagram.
We’ll be hosting a workshop here at the homestead on June 23rd & 24th. Find more details about the workshop on our events page. Also, don’t forget to check out our contest:
The contest is now closed, thanks to everyone who signed up!
To register for the wall workshop email [email protected].

What Our Wall Will Look Like:
We’re planning on using concrete stucco for our walls. While I like cob as a material, I want to have raised beds up against our wall, which means wet soil touching the surface of the wall. To do that, I have to be sure that the wall won’t decompose, so concrete is the best option for this situation. Here’s some photos I have accumulated from around the internet that give you an idea of what our wall will look like once completed:


Why On Earth We’re Building a Wall:
We live on a busy arterial road, with lots of road noise. Our home blocks out the noise well, but a large part of why we bought our home was to be able to garden and enjoy our yard, and that’s difficult to do with cars zipping by throughout the day. Yes, we should have accounted for that a little better before we moved in, but nevertheless, here we are with a noisy yard.
Options for Blocking Road Noise:
I spent a lot of time researching methods to block road noise. Near highways where the noise is exceptionally bad, it tends to be either a concrete wall or a berm. After lots of research, the summary is that plants won’t block road noise, wood fences won’t block much road noise, but a wall or barrier built with soil, water (like a cistern), or stone can block road noise well.
Berms work incredibly well, that probably would have been our first choice on a larger property. But, berms take up a wide space that we don’t have, and visually… let’s just say they’re an acquired taste in an urban setting.
So basically we were left with the option to build a wall. We could have just built a tall cement wall and been done with it, but we wanted to do something more sustainable that required less cement, which isn’t very environmentally-friendly.
Over the course of 6 months I considered a variety of natural building options including a straw bale wall, a cob wall, and a ferrocement wall that would double as a cistern. The final wall option that felt right was using earthbags. Using a cement stucco over the earthbags will use about 15% of the total concrete, and achieve the same visual look.
What the Heck Are Earthbags?
Earthbags are just normal polypropelene sand bags, but they’re filled with dirt instead of sand. They get stacked on top of one another like bricks to form a structure, and they stick together with 4-prong barbed wire placed between them. After the structure is built with the earthbags, it is typically covered in a stucco or plaster made of cement, cob, or lime.
Here’s a photo of an entire home being built with earthbags:

Here are photos of the same home after it was finished being covered with cob:

As you can see, once it’s finished it doesn’t look too different from any other natural building.
Finding Materials:
I thought that it would be difficult for us to find enough clay nearby for an entirely cob wall. Earthbags, however, don’t require a clay to sand mix ratio as specific as what’s required by cob. Because of that, it seemed to be the easier project in terms of acquiring the materials necessary to complete it.
Our Wall Workshop with Earthen Hand:
After deciding earthbags was the method I wanted to use, I reached out to Scott Howard of Earthen Hand Natural Building in Portland, OR. Scott is the builder of the cob/earthbag home pictured above, as well as a bunch of other projects in the Pacific Northwest and abroad.
We decided the wall would be a good opportunity for a workshop here at Seattle Homestead, and set a date of June 23rd & 24th (3 weekends from now!). The workshop will feature 2 days of learning about how earthbag building works and what it can be used for, and then getting outside and getting hands on experience with wall construction.
The cost of the workshop is $180 and includes lunch both days. Registration and signup info can be found on our events page. There is a discount for participants who bring a friend or sign up for another one of Earthen Hand’s natural building workshops.
To register, email [email protected] and let him know you’re interested in the Earthbag Building Basics Workshop on June 23/24 in Seattle.
Getting Ready for the Wall Workshop:
Over the last few months we’ve removed all of the ugly privets that used to surround the yard, taken out the 130 foot chain-link fence, and just had the property lines surveyed so we can dig the trench for the wall footing and be ready for the workshop in a couple weeks.
We’re looking forward to showing you all what the finished product looks like!